Voice Studio end to end
Every image on this page is a live screenshot of the running app. Voice Studio works entirely offline — the models run on your machine and no audio is ever sent anywhere.
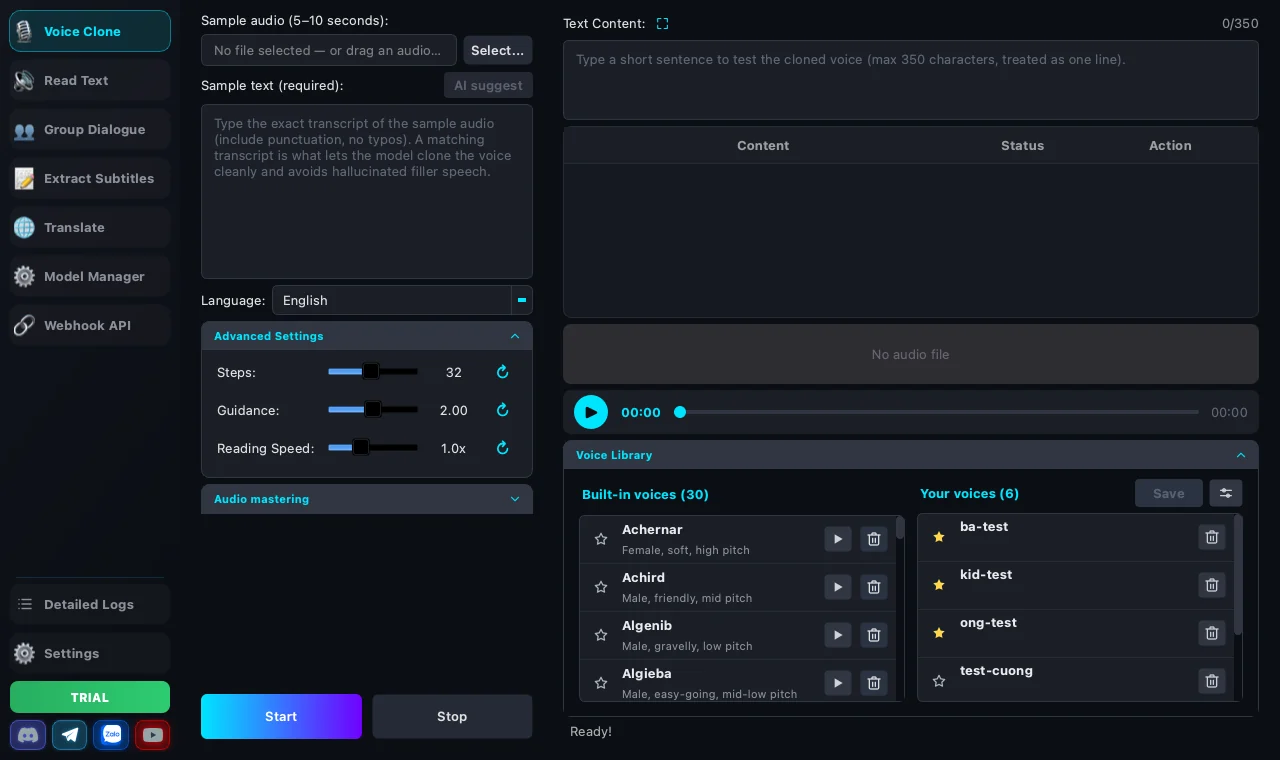
What Voice Studio is
A desktop app that runs speech models directly on your machine. No internet needed to generate audio, no per-character fees, and the audio never leaves your computer.
Generate voices
Clone a voice from a short sample, or build a new one from voice attributes.
Many characters
Dialogue scripts where every character gets their own voice.
Subtitles
Transcribe audio/video, then translate the subtitles with an LLM.
Install & load models
The first run needs to download the models. Go to Model Manager in the sidebar, download the speech (TTS) package — that one is required — and at least one recognition model if you plan to extract subtitles.
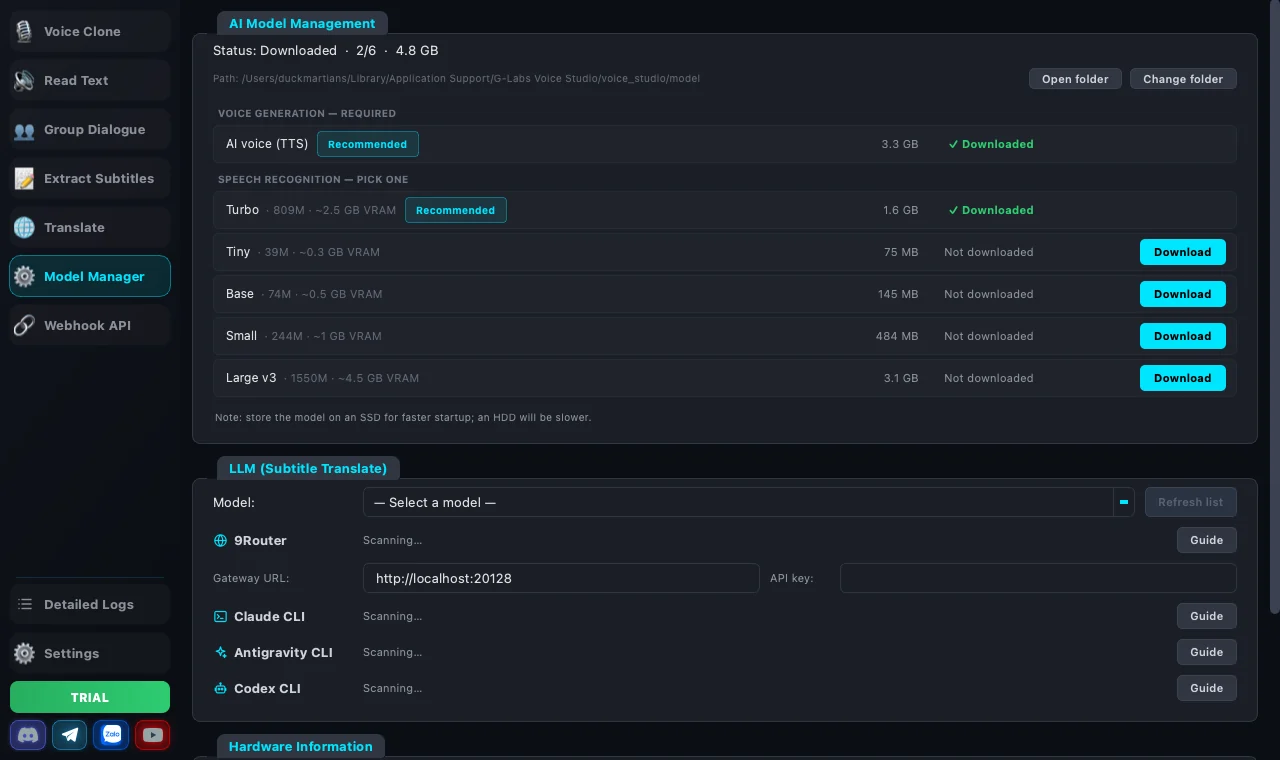
Voice Clone
Clone a voice from 5–10 seconds of reference audio. This is the screen the app opens on.
- Reference audio file — drag and drop or browse for a file. The cleaner the sample (no background music, no overlapping speakers), the closer the clone.
- Reference text (required) — type out exactly what is said in the sample. A single wrong word skews the voice. If you would rather not type it, hit AI suggest and Whisper fills it in.
- Text content — enter the lines you want read in the cloned voice, one sentence per line.
Advanced Settings
Detail level (number of generation steps), Guidance strength (how tightly it follows the sample) and Speaking speed. Every field has a ↺ button to restore the default — experiment freely, nothing breaks.
Read Text
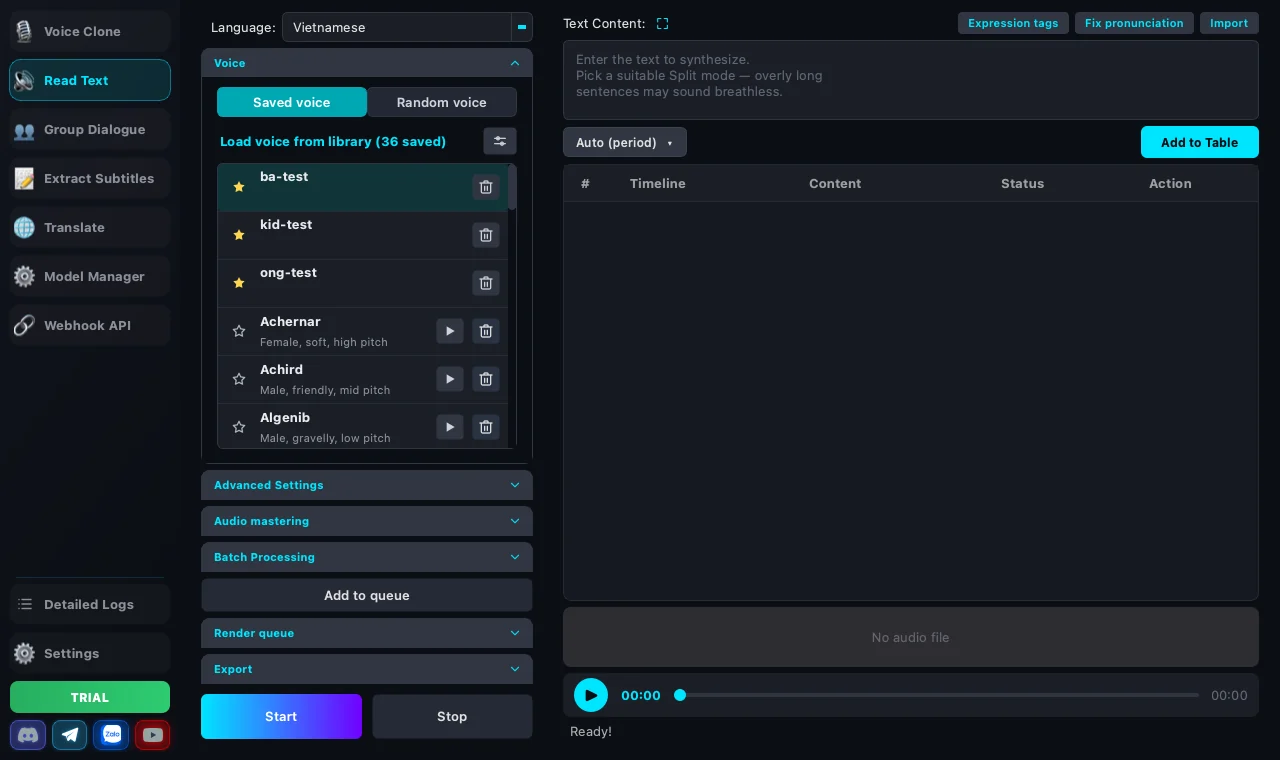
Generate a voice with no reference audio at all. Pick a preset voice from the library, or hit random voice and let the app roll a fresh one.
.srt.Group Dialogue
Multi-character scripts, one voice per speaker. Write in the <Name>: line of dialogue format, then assign a voice to each name in the voice casting panel.
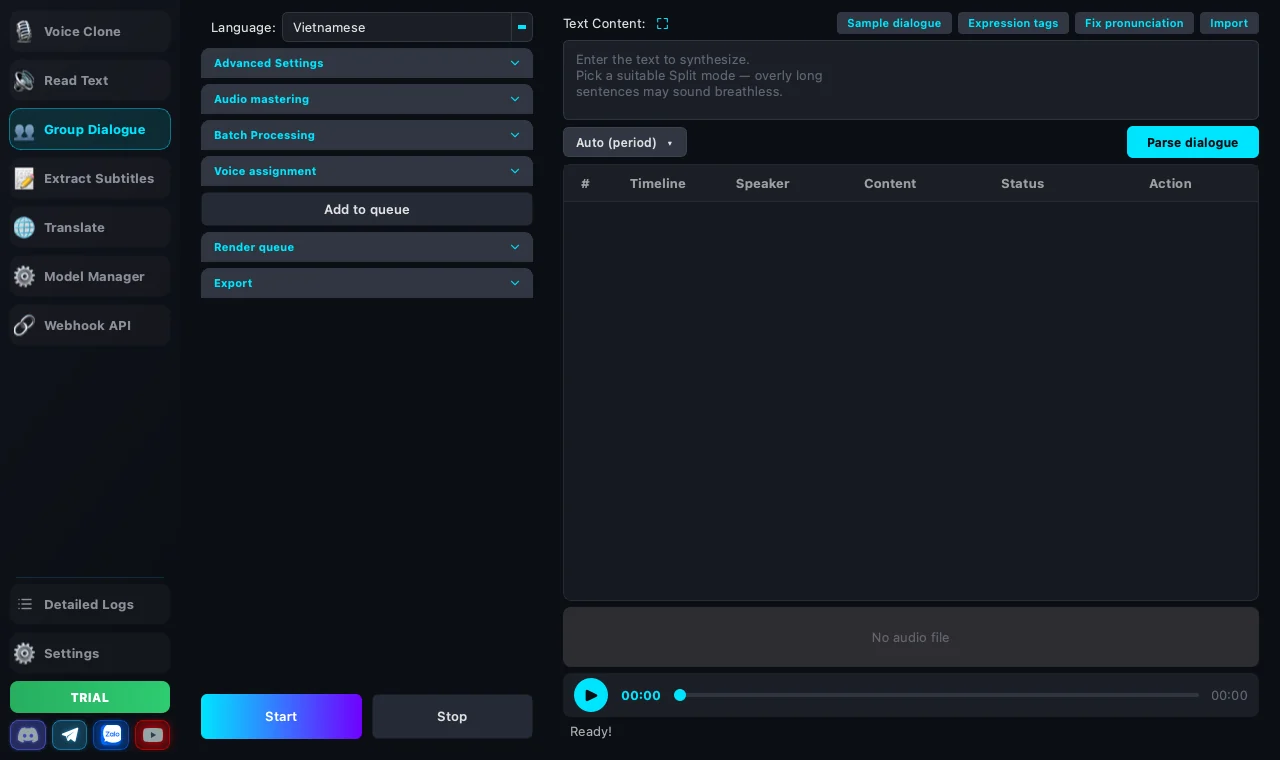
Great for podcasts, audio drama and interview videos — anything where a single flat narrator gets boring fast.
Extract Subtitles
Turn speech in audio or video (MP3, WAV, M4A, FLAC, MP4, MOV…) into text with timecodes.
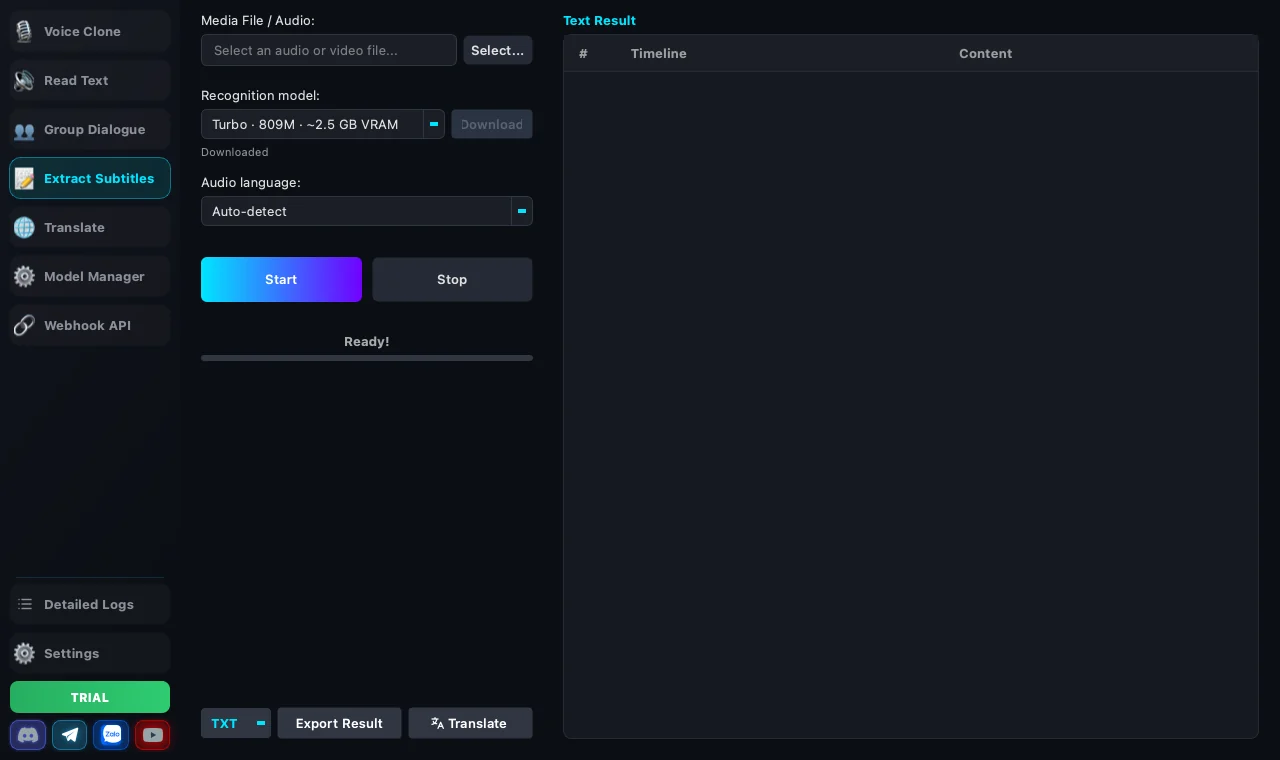
- Audio language — "Auto-detect" works fine, but naming the language explicitly is more accurate on short clips.
- Export plain .txt, or .srt with timecodes to drop straight into your video.
- One button sends the result over to the Translate tab.
Translate
Translate a subtitle file with an LLM without breaking the timing: the line count and the timecodes are held absolutely fixed, and the AI is only allowed to change the words.
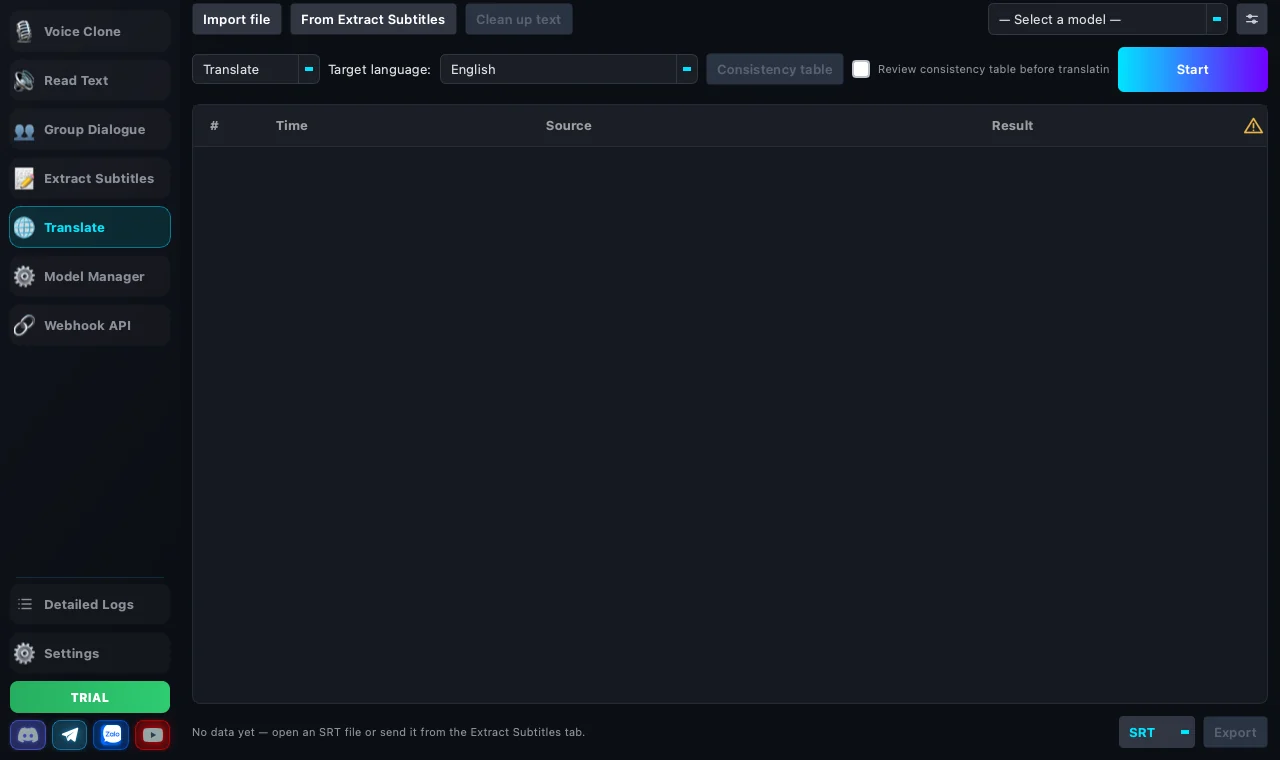
.srt, .vtt, .ass, .sbv and plain .txt. You can also pull the result straight from the Extract Subtitles tab.Consistency table
Before translating, the app reads the whole file to lock in the tone, terminology and forms of address, then feeds that table into every chunk it translates. This is what stops proper nouns and pronouns from drifting halfway through — and you can edit the table before the run starts.
Model Manager
One place for everything heavy: the speech model, the recognition models, and the LLM used for subtitle translation.
- 9Router — a gateway running on your machine that funnels several model sources into a single endpoint.
- Claude CLI · Antigravity · Codex — use the CLI plan you already pay for, no separate API key needed.
- Hit Refresh after installing a CLI so the app rescans and repopulates the model list.
Webhook API
Turn on a local HTTP server so other tools can call in to generate speech — n8n, Make, Zapier, a Python script, or G-Labs Story Machine.
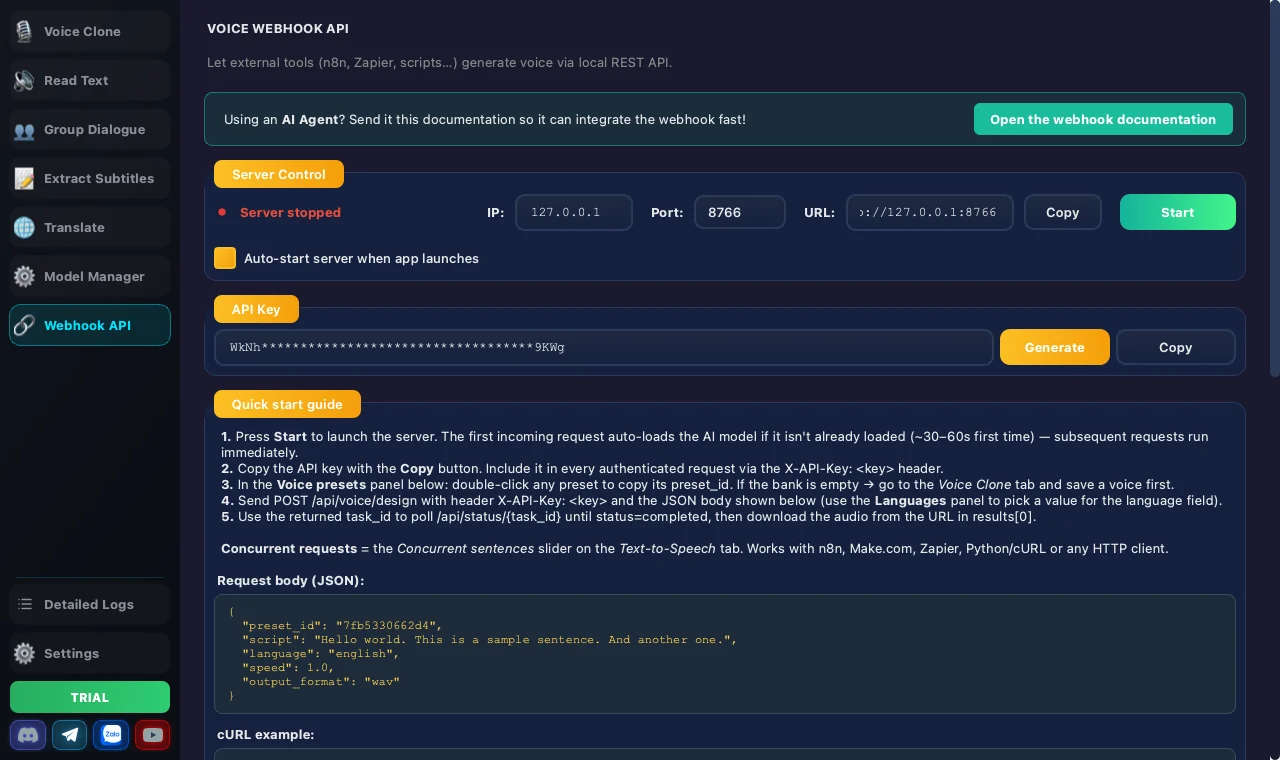
8766, paste the URL and the API key into Story Machine, done.Voice Library
Shared across all three audio-generating screens. The app ships with 30 preset voices (male/female, a range of timbres); the voices you clone are saved here with a name and a short description.
Pin favorites
Hit ★ to push the voices you use most to the top of the list.
Move to another machine
Back up and restore with a .vcp file — you can share it with other people too.
Tips & troubleshooting
The clone does not sound like the sample
Nine times out of ten the reference text does not match the audio. Listen again and type it word for word, or press AI suggest. Background music or two overlapping speakers will skew the voice as well — cut out the cleanest 5–10 seconds.
The app misreads special characters (100%, 25°C, m²…)
Use the pronunciation dictionary: spell it out phonetically once and the app remembers it per language and applies it from then on.
Can I use it without an NVIDIA GPU
Yes. The app falls back to multi-core CPU (and MPS on Apple Silicon). Slower, but it works.
Subtitle extraction misspells proper nouns
Switch to a bigger model (Large v3) and set the audio language explicitly instead of leaving it on auto-detect.
Subtitle translation throws the line count off
It cannot happen — the app hard-locks the line count and the timing. If one line fails to translate, it keeps the original text and flags it with ⚠ for you to fix by hand, rather than desyncing the whole file.
Story Machine says Voice Studio is not configured
Open the Webhook API screen, press Start on the server, then copy the URL and API key into Story Machine's settings.